
Using GitHub and VS Code to Test and Debug Code
For the following instructions, we will use Lab 7 repo as our example.
VS Code install instructions are given for Mac and Windows.
- Clone Assigned Repo
- .gitignore in Repo
- Project Structure of Repo
- JUnit Jar File
- Open Code in VS Code
- Execute Source Code in VS Code
- Execute Test Cases in VS Code
- Using Debugger to Debug Code Based On Failing Test Cases
Clone Assigned Repo
From the terminal, you will clone your assigned repo.
Note: You should be in the directory where you would like to store the lab repo (e.g., csc116):
1
2
$ cd <PARENT_DIRECTORY>/csc116
$ git clone COPIED_URL
.gitignore in Repo
If your repo does not contain .gitignore, (a) copy .gitignore from another repo using cp command OR (b) create the file with the following contents:
1
2
3
4
5
6
7
8
9
10
11
12
13
14
15
16
17
# This rule ignores class files
*.class

# This rule ignores the contents of the bin/ build output directory (which includes .class files)
bin/

# This rule ignores temporary files that end with ~
*~

# This rule ignores the contents of the .settings directory that text editors will sometimes make
.settings/

# This rule ignores .DS_Store on Macs
**/.DS_Store

# This rule ignores VS Code directory
**/.vscode
Project Structure of Repo
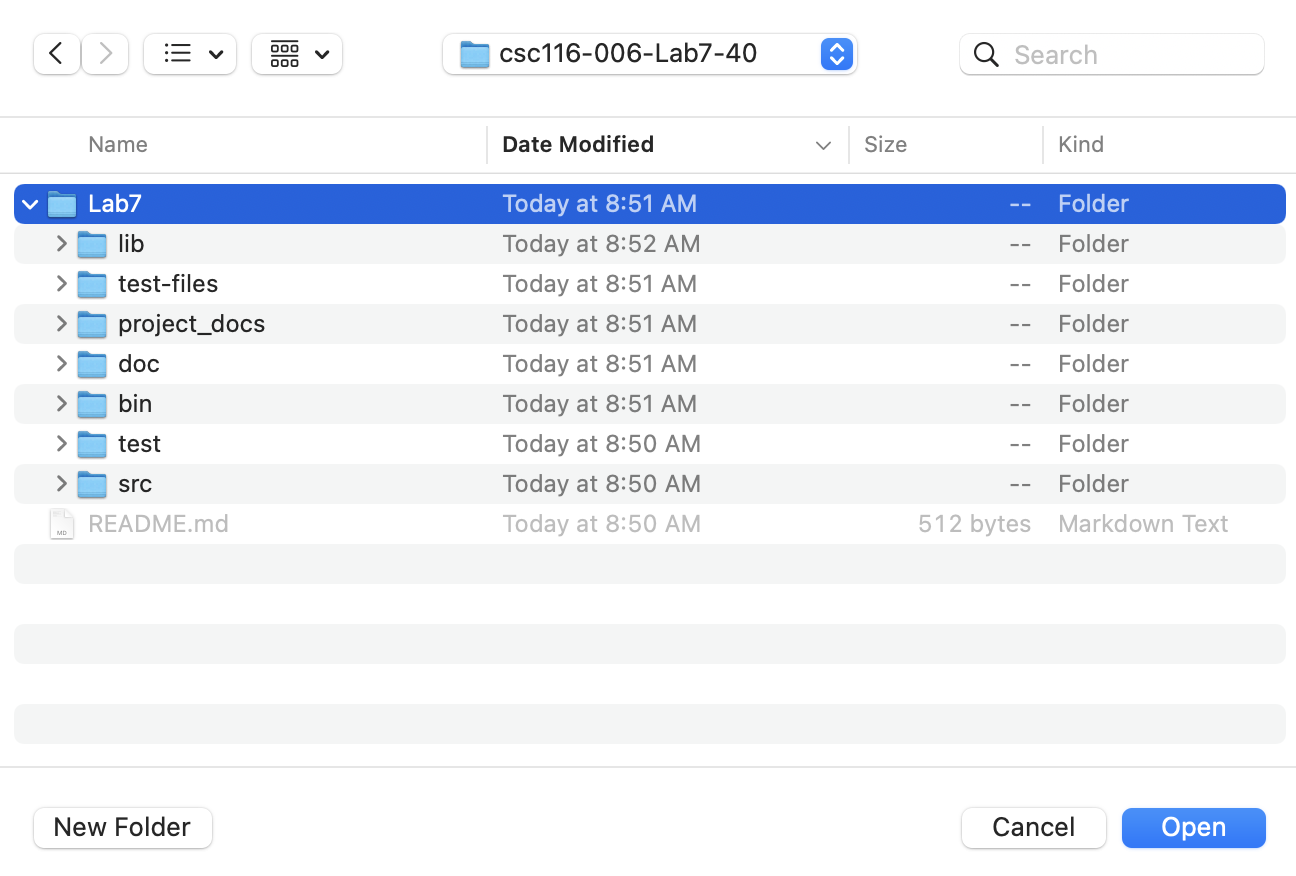
Within your repo, you will use the following project structure where within your repo you have a project directory (such as Lab7 or Project1). Within the project directory, you will the following directories (which may be empty): bin (.class files), doc (HTML files), lib (library jar files), project_docs (project documents, such as system test plan), src (.java files), test (test programs), and test-files (input/output files for tests).
The following shows the structure for Lab 7:
1
2
3
4
5
6
7
8
9
10
11
- Repo (e.g., csc116-001-Lab7-70)
- - .gitignore
- - README.md
- - Lab7
- - - bin
- - - doc
- - - lib
- - - project_docs
- - - src
- - - test
- - - test-files
Given an empty repo directory, you can create the needed directories with the following commands:
1
2
3
4
5
$ pwd
<PARENT_DIRECTORY>/csc116/csc116-001-Lab7-70
$ mkdir Lab7
$ cd Lab7
$ mkdir bin doc lib project_docs src test test-files
JUnit Jar File
Download junit-platform-console-standalone-1.6.2.jar file into your lib directory in your project. The jar file can also be copied from other local repos you have on your machine.
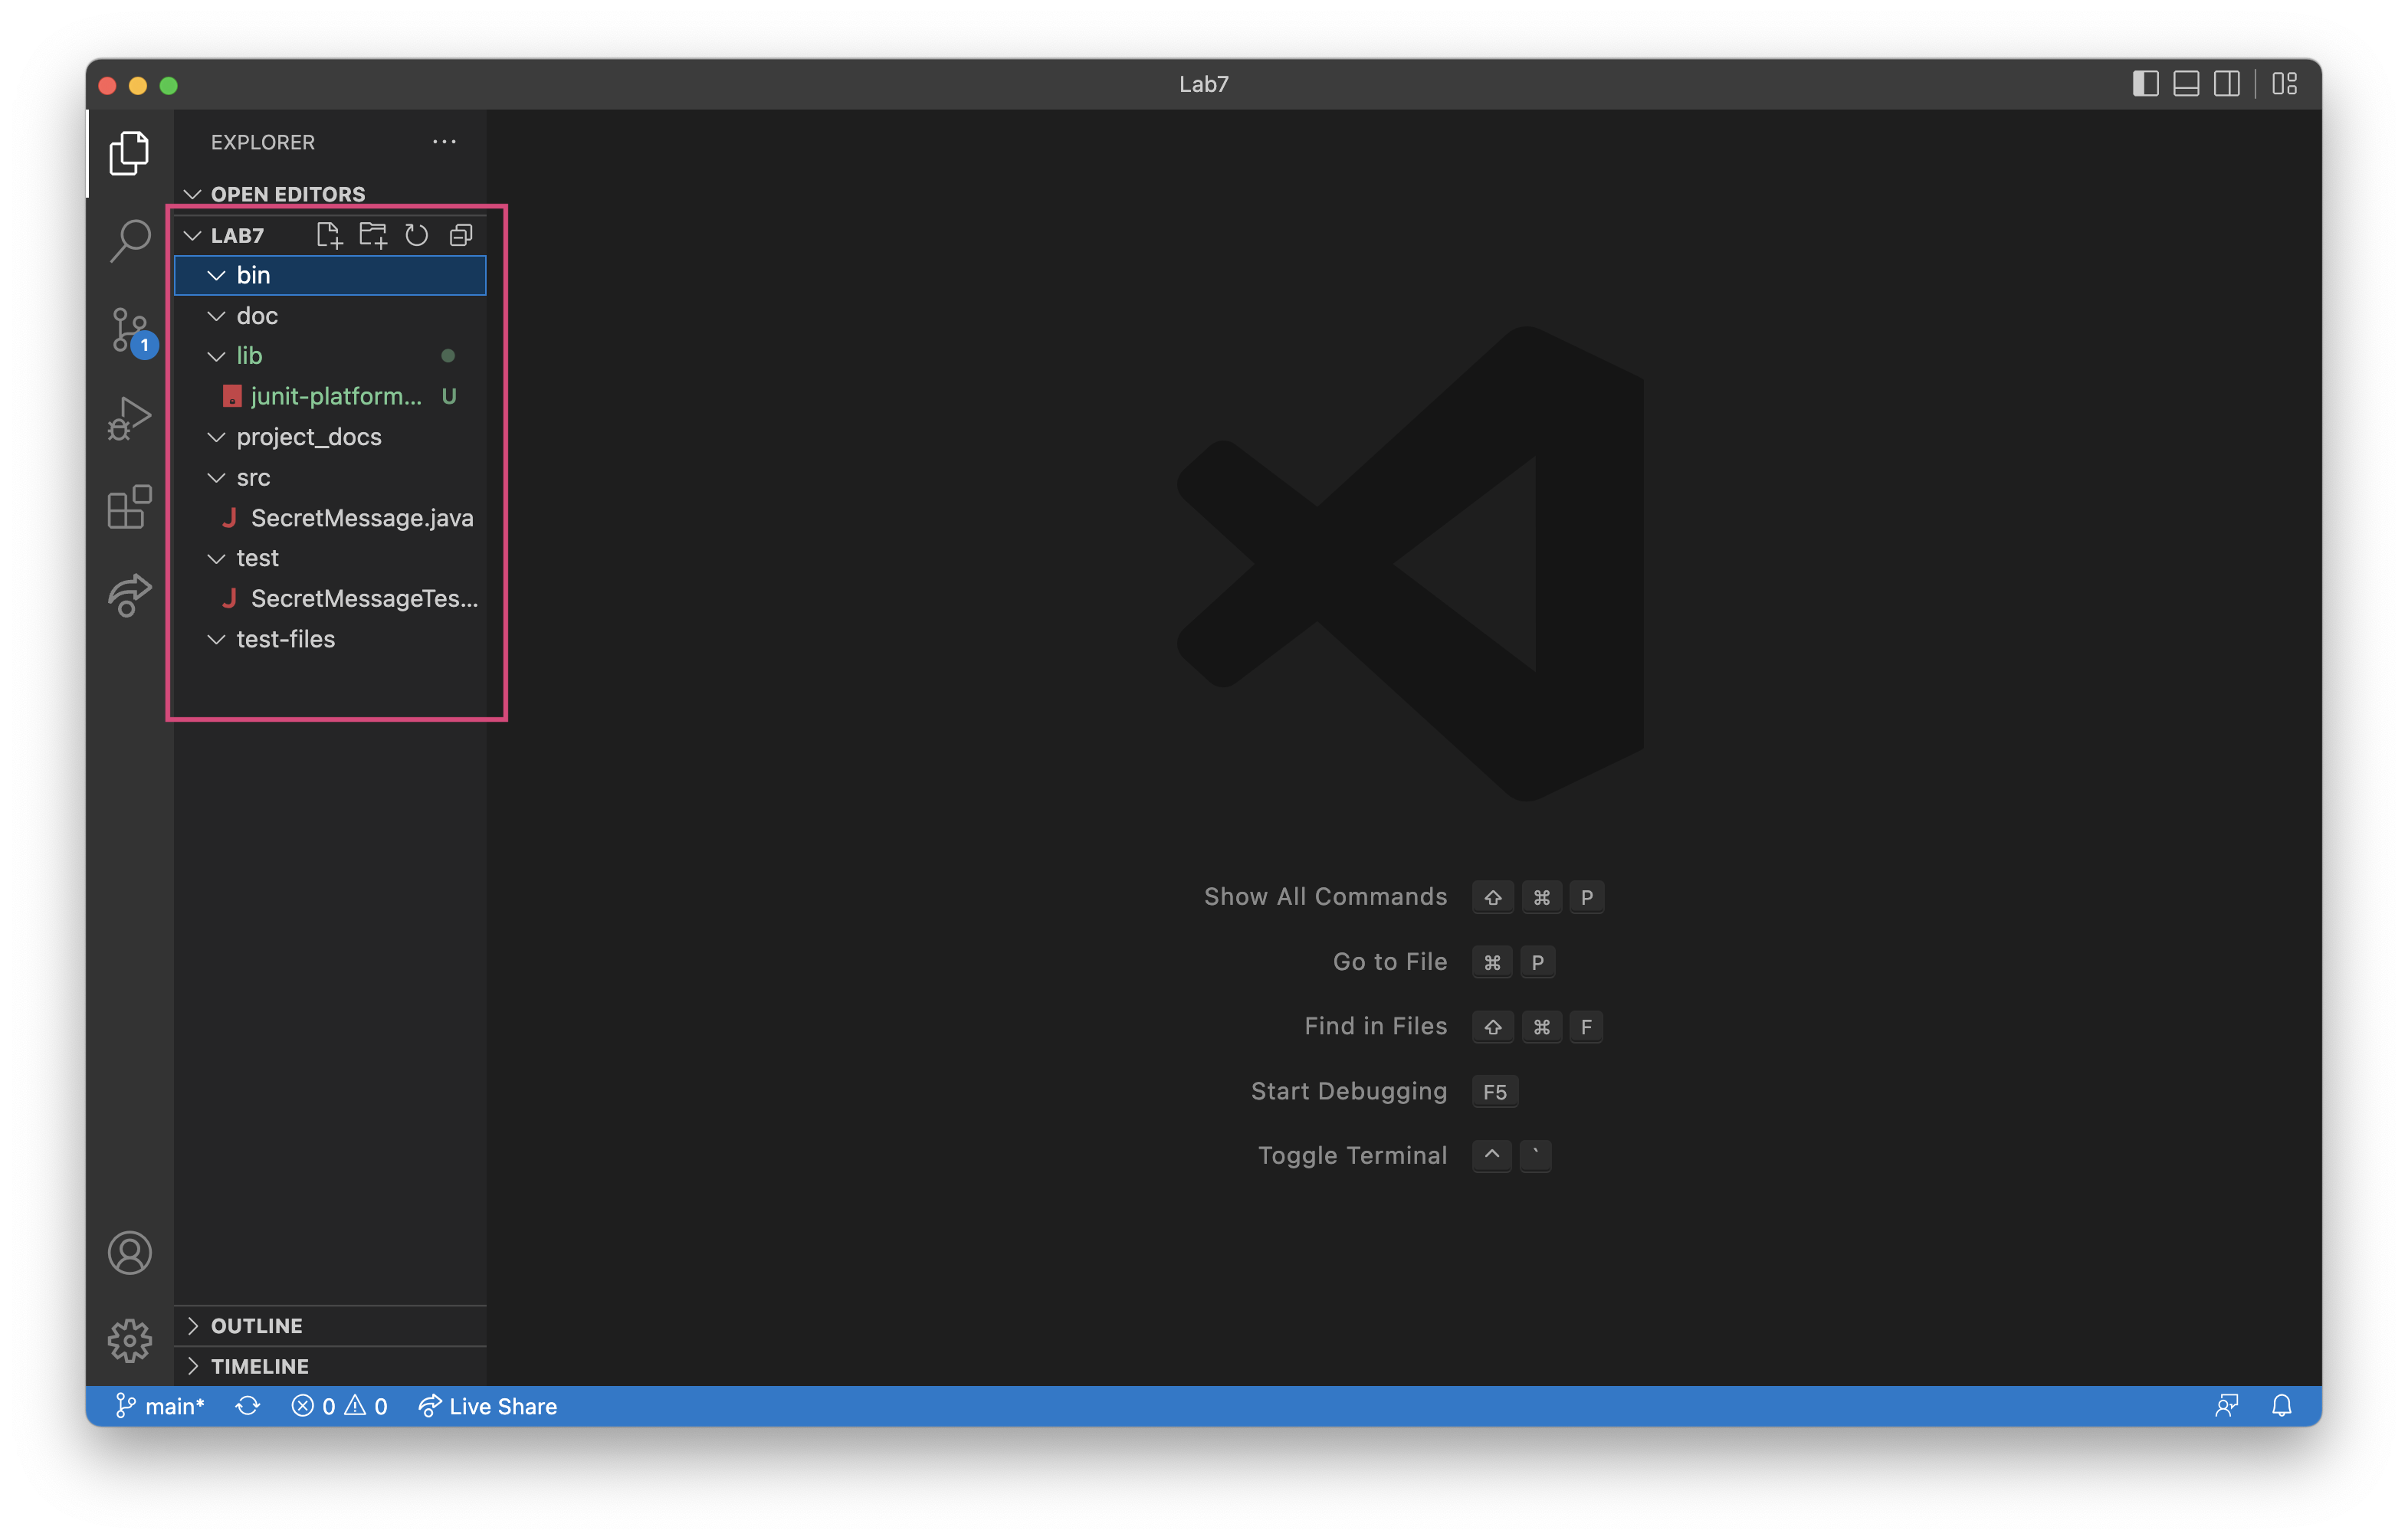
Open Code in VS Code
You will open your project directory (e.g., Lab7) in VS Code using File > Open Folder...
After opening the folder, you will see the folder structure to the left.
Execute Source Code in VS Code
You can run source code in VS Code using the Run Java triangular button at top right.

Execute Test Cases in VS Code
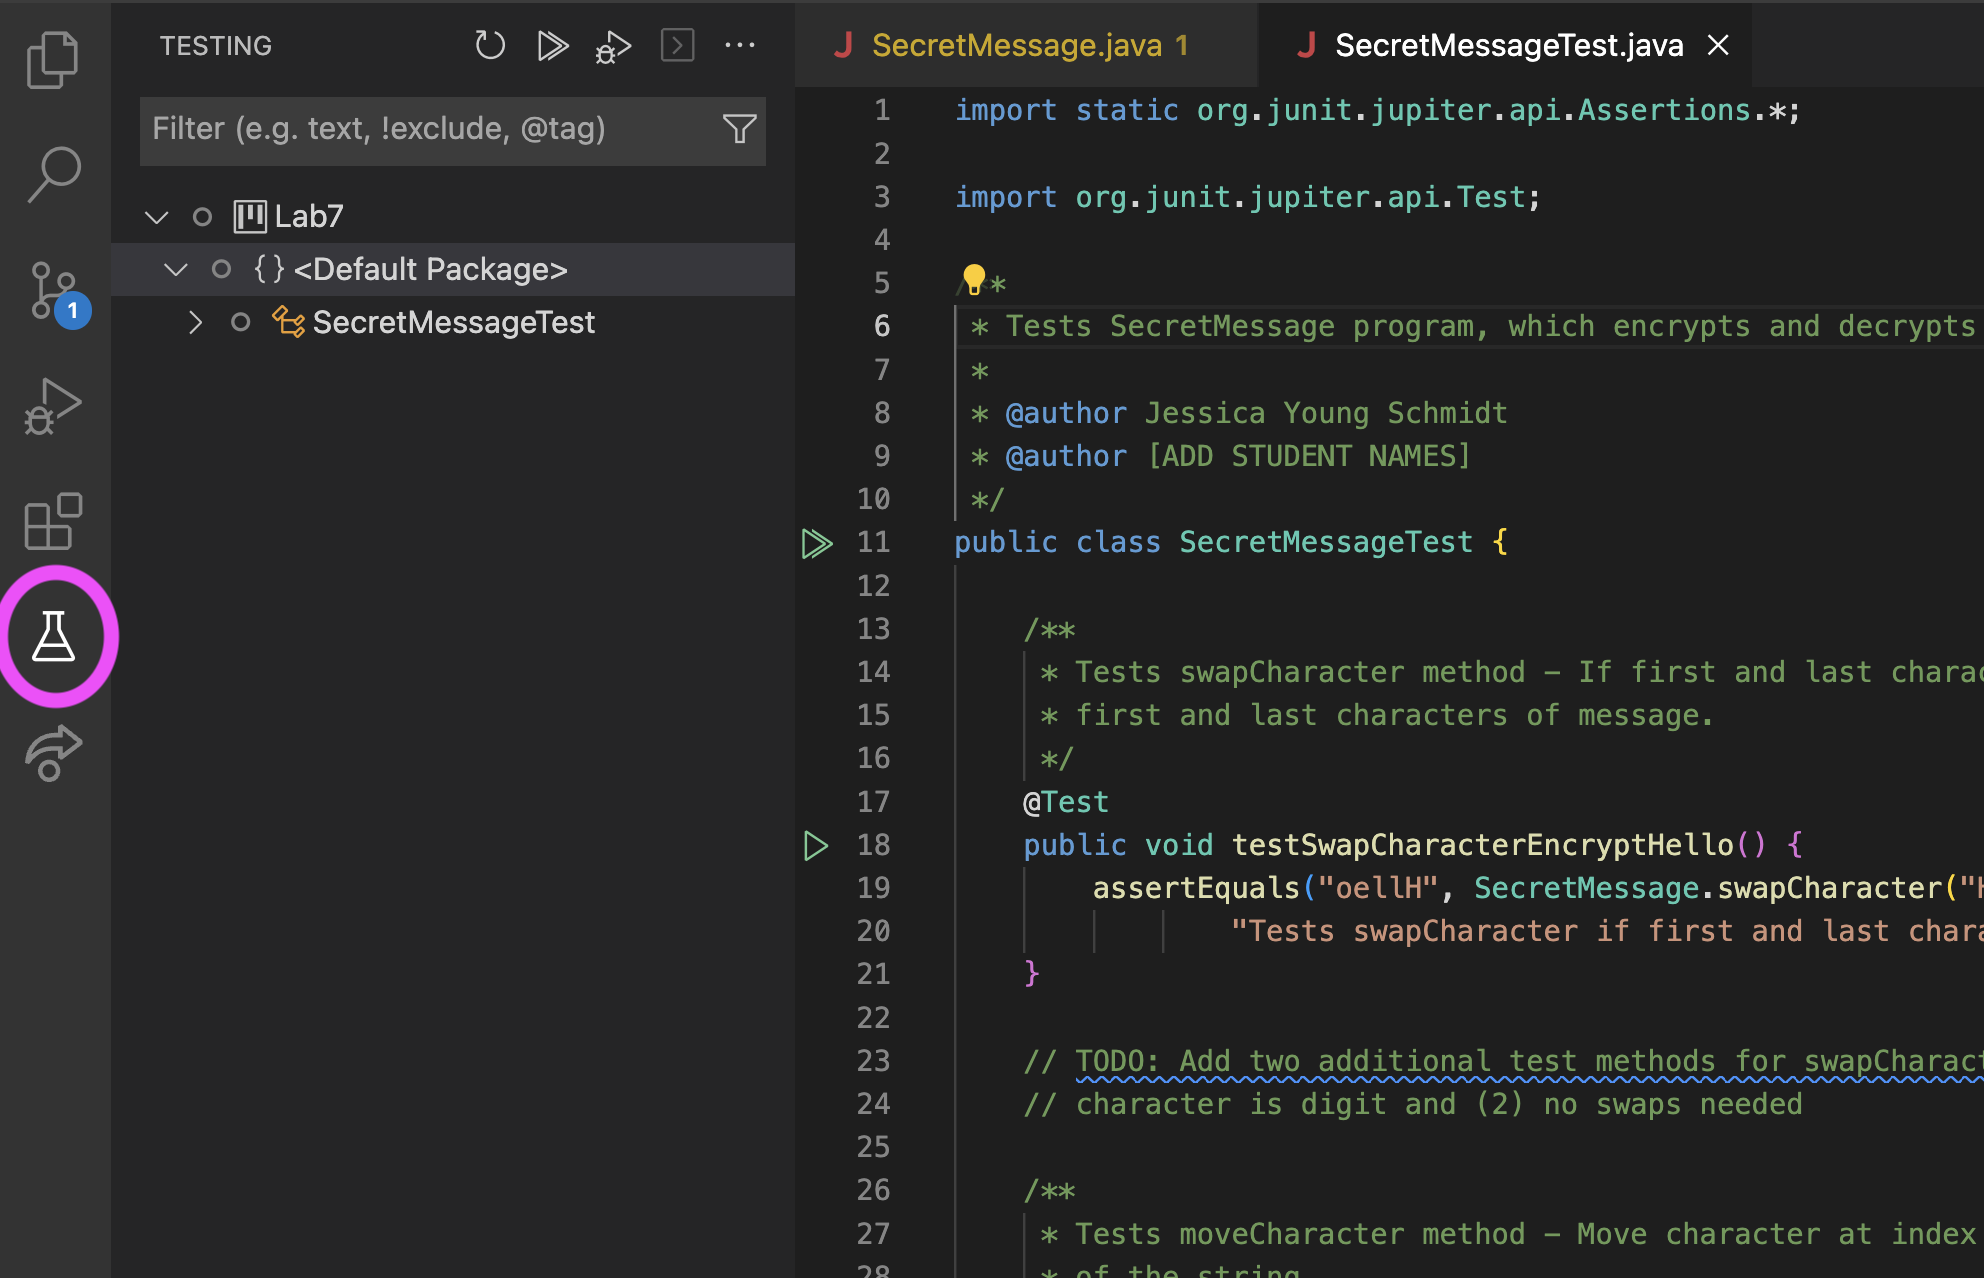
To execute test cases in VS Code, you will select the testing explorer.
To run all cases tests, click Run Tests icon (double triangles) at the top.

After running all test cases, we can see results for the test, including which tests passed (green) and which tests failed (red).

Using Debugger to Debug Code Based On Failing Test Cases
We are currently failing 5 tests. We are going to focus on failing test cases for methods that do not call other SecretMessage methods.
Debugger Controls
The VS Code toolbar provides buttons for working with the debugger. There are 7 buttons in the toolbar:

- Continue: continues the current execution from the given program point
- Step Over: steps over a method call without going into the details of the method
- Step Into: steps into a method call
- Step Out: finishes execution of the current method and returns to the caller
- Restart: restarts from breakpoint
- Stop: stops the debugging execution. Always stop your debugging executions or you’ll use up a lot of system memory!
- Hot Code Replace
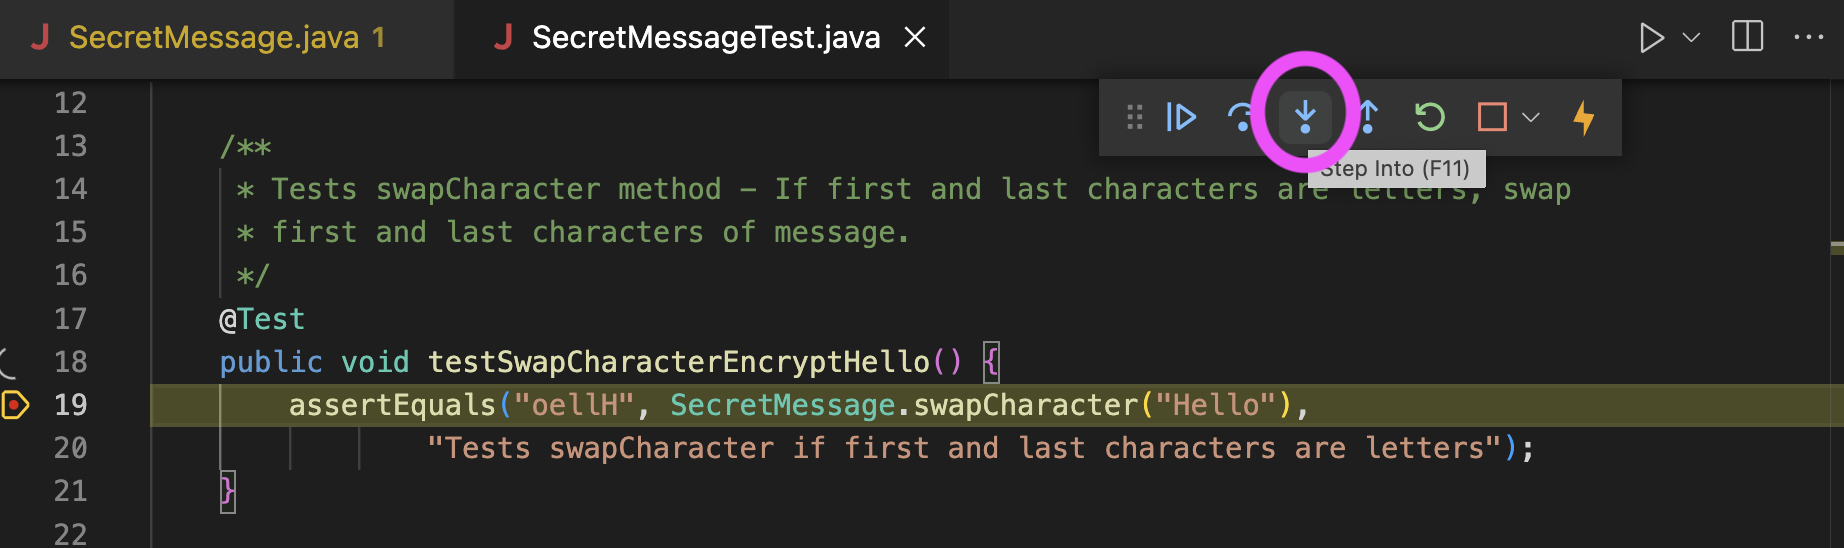
testSwapCharacterEncryptHello
Click on testSwapCharacterEncryptHello in the testing window. This will take you to the failing test case and show the stacktrace for the test, which is the same information we would have seen if executing test cases from the command line.
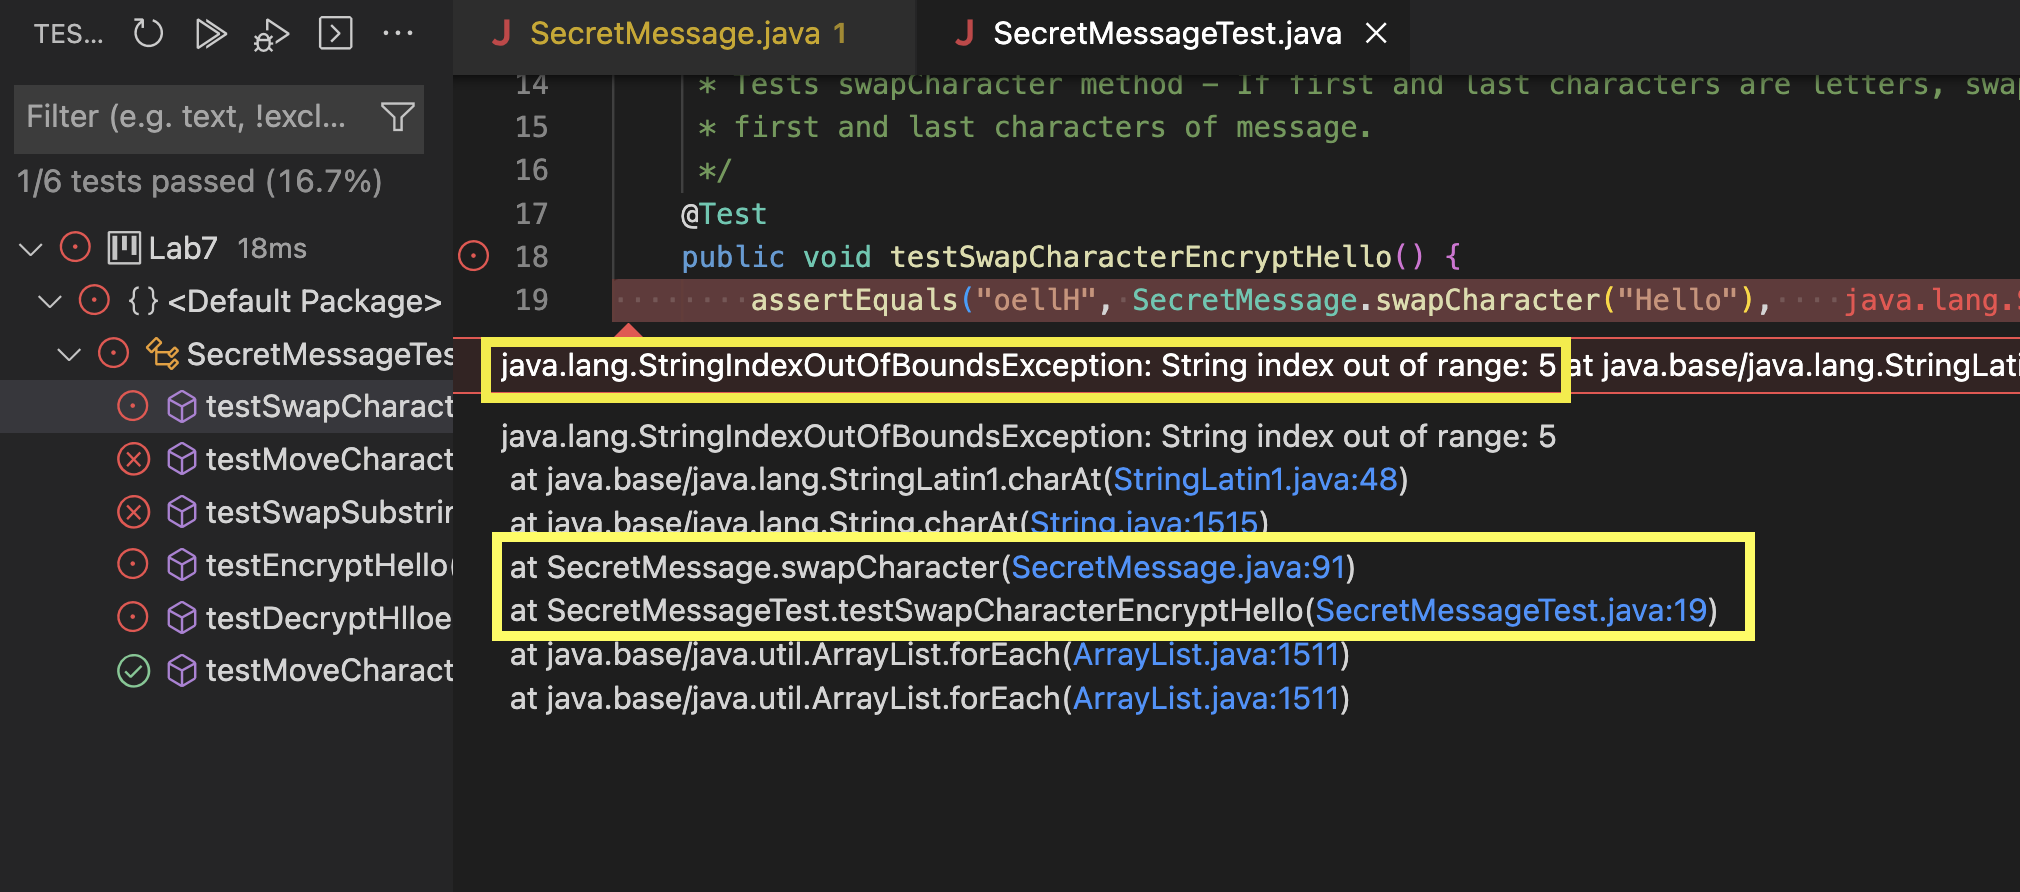
We examine line 19 of SecretMessageTest.java, which is a call to assertEquals:
1
2
3
4
5
6
7
8
9
    /**
     * Tests swapCharacter method - If first and last characters are letters, swap
     * first and last characters of message.
     */
    @Test
    public void testSwapCharacterEncryptHello() {
        assertEquals("oellH", SecretMessage.swapCharacter("Hello"),
                "Tests swapCharacter if first and last characters are letters");
    }
The call to assertEquals tells us the following about our test case:
- Input: “Hello”
- Method testing:
SecretMessage.swapCharacter - Expected output: “oellH”
- Actual output:
SecretMessage.swapCharacter("Hello")
This information will help us as we trace the swapCharacter method.
Next we examine line 91 of SecretMessage.java: char last = message.charAt(length);, which throws StringIndexOutOfBoundsException stating String index out of range: 5
1
2
3
4
5
6
7
    public static String swapCharacter(String message) {
        int length = message.length();
        if (length < 2) {
            return message;
        }
        char first = message.charAt(0);
        char last = message.charAt(length);
We can use the debugger to help us trace the code. Within SecretMessageTest.java, we add a breakpoint to line 19. A breakpoint is added by clicking to the left of the line number; a red dot will appear. Now we click Debug Test.

When the debugger gets to the breakpoint, we click Step Into.
We can click Step Over until we get to line 91. As we do so, variable values will be displayed in the left pane along with inline to the right of the code.

Based on the test case, we know that message is “Hello”, which has a length of 5. Since indexing of strings starting at 0, the largest index for a string is length - 1. Therefore, we have found a bug (error) in SecretMessage.
After changing line 19 to char last = message.charAt(length - 1);, we execute our test program again to find that testSwapCharacterEncryptHello is now passing.
Stop debugger execution.
testMoveCharacterEncryptHello
Click on testMoveCharacterEncryptHello in the testing window. This will take you to the failing test case and show the stacktrace for the test, which is the same information we would have seen if executing test cases from the command line.
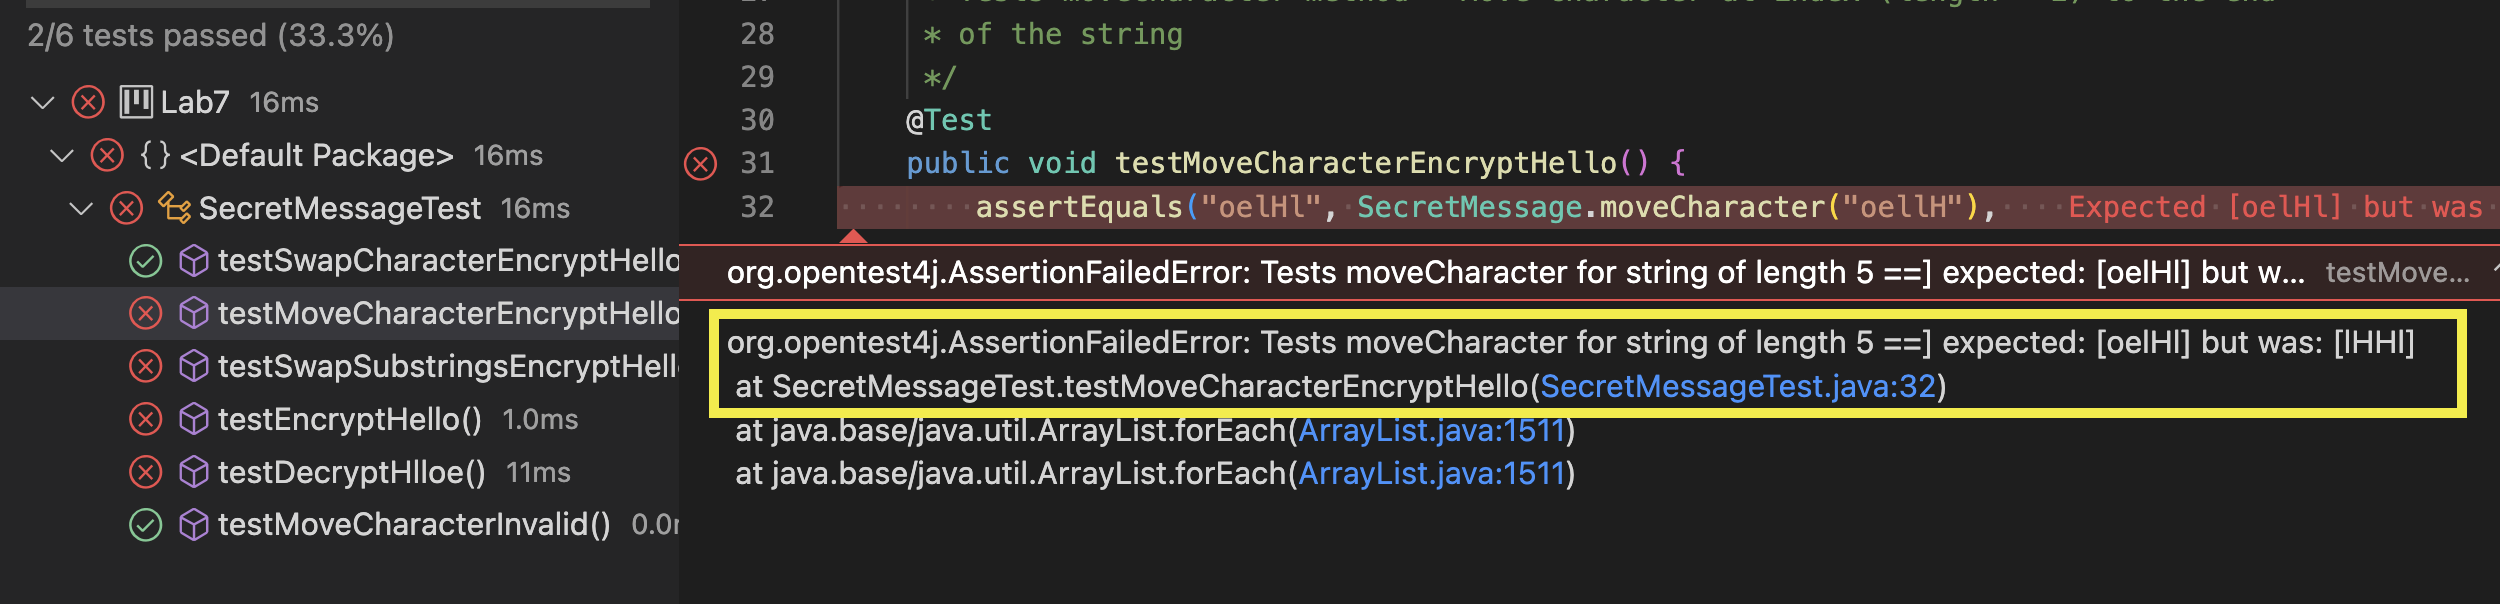
testMoveCharacterEncryptHello has different expected (“oelHl”) and actual (“lHHl”) results.
Unlike the previous failing test case, the stacktrace only lists the test program and not the source code.
We examine line 32 of SecretMessageTest.java to see the failing test case:
1
2
3
4
5
6
7
8
9
    /**
     * Tests moveCharacter method - Move character at index (length - 2) to the end
     * of the string
     */
    @Test
    public void testMoveCharacterEncryptHello() {
        assertEquals("oelHl", SecretMessage.moveCharacter("oellH"),
                "Tests moveCharacter for string of length 5");
    }
The call to assertEquals tells us the following about our test case:
- Input: “oellH”
- Method testing:
SecretMessage.moveCharacter - Expected output: “oelHl”
- Actual output:
SecretMessage.moveCharacter("oellH")
Next we examine moveCharacter of SecretMessage.java:
1
2
3
4
5
6
7
8
9
10
11
12
13
14
15
16
17
    /**
     * Returns results of *Move character* step of encrypt and decrypt algorithms.
     * Works for messages of length two or greater.
     *
     * @param message message to encrypt or decrypt
     * @return message that results from *Move character* step of encrypt and
     *         decrypt algorithms
     * @throws IllegalArgumentException if length of 0 or 1
     */
    public static String moveCharacter(String message) {
        int length = message.length();
        if (length < 2) {
            throw new IllegalArgumentException("Invalid string");
        }
        return message.substring(length - 2) + message.substring(length - 1)
                + message.charAt(length - 2);
    }
We can use the debugger to help us trace the code. Within SecretMessageTest.java, we add a breakpoint to line 32 and click Debug Test.
As we debug the code, we should consider where it does match our given algorithm:
Move character at index (length - 2) to the end of the string.
Both calls to substring get the right portion of the message. We need to consider how we would get the left portion of the message, which will help us debug the problem.
Stop debugger execution.