
The Eclipse IDE provides a development environment for Java applications with a standard set of tools that developers typically use to support their work. The functionality of Eclipse can be further extended through the use of plug-ins.
Target Audience: This tutorial is intended for those that are setting up their personal computers for Java application development in courses using Eclipse.

Updating an Existing Eclipse Install
If you already have Eclipse installed, look for updates for Eclipse and the plug-ins. Follow the Update Wizard under the Help > Check for Updates. You may need to update configurations for CheckStyle and PMD after updating.
NOTE: Different courses may use a different version of Eclipse:
- CSC 216/217: Eclipse IDE for Java Developers
- CSC 316: Eclipse IDE for Java Developers
- CSC 326: Eclipse IDE for Enterprise Java and Web Developers
If you are setting up an environment for CSC 326, please start from scratch with the Eclipse IDE for Enterprise Java and Web Developers
Java - Installation

Java Version
INSTALL JAVA 21!
Java 21 is the most recent “long term support” release of Java. Long term support, means that Java 21 will be maintained until the late 2020s/early 2030s [Wikipedia’s Java Version History].
Java libraries are required to run the Eclipse platform. The Java Development Kit (JDK) provides the Java libraries in addition to the javac and java commands for compiling and executing Java programs. The Java Runtime Environment (JRE) provides the Java libraries and the java command for running Java programs. While Eclipse only requires the JRE to run, most Java developers prefer to install the JDK so that they have access to the compilation functionality from the command line or when using other IDEs.
Java also comes in several editions: standard edition (SE), enterprise edition (EE), and micro edition (ME). EE is used for enterprise level development, typically at large corporations, while ME is used for mobile and embedded development. SE provides enough functionality for most medium to large development activities. If there’s an option, you want to download a Java SE.
The JDK can be downloaded from:
- Eclipse Temurin from Adoptium
- Select “Other Downloads”
- The “JDK 21 - LTS” tab
- Download the version appropriate for your OS. For Windows users, we recommend the MSI and for MacOS, we recommend the PKG.
- Oracle
- OpenJDK - Linux ONLY
Download the executable (JDK SE from Eclipse Temurin or Oracle or use yum/atp-get for Linux) for your operating system and follow the installation instructions. If you don’t like the provided directory, you can select another directory.
Remember which directory you installed the JDK in.
Java - Setup
Ensure that your Java setup also works on command line tools.
Testing Your Java Setup
After you have installed Java, you should test the javac and java commands in a terminal (command line) window. Most installations will add the new version of Java to your system’s path; this step checks.
- Windows: Click the Start button and search for Command Prompt.
- Mac: Open the Terminal application. If the Terminal application is not in your dock, you can open it from Application folder > Utilities folder > Terminal app (and add it to your dock).
- Linux: Open the Terminal as appropriate for you Linux install.
In the terminal window, run the commands javac -version and java -version. Check that the most recently installed version of Java prints. An example of what the commands and output might look like are below. Your output should match on the major version (e.g., 21), but may not match on the minor version (e.g., 0), and release (e.g., 8) since you are likely downloading your version of Java 21 after this install tutorial was published.
Your output may look at little different depending on what source you used for Java. The important thing is that the major version (the first number) is 21.
1
2
3
4
5
6
7
$ javac -version
javac 21.0.9

$ java -version
openjdk version "21.0.9" 2025-10-21 LTS
OpenJDK Runtime Environment Temurin-21.0.9+10 (build 21.0.9+10-LTS)
OpenJDK 64-Bit Server VM Temurin-21.0.9+10 (build 21.0.9+10-LTS, mixed mode, sharing)
If you installed Oracle Java, your output will look similar to what’s listed below (remember a new release may mean a different release number).
1
2
3
4
5
6
7
$ javac -version
javac 21.0.7

$ java -version
java version "21.0.7" 2025-04-15 LTS
Java(TM) SE Runtime Environment (build 21.0.7+8-LTS-245)
Java HotSpot(TM) 64-Bit Server VM (build 21.0.7+8-LTS-245, mixed mode, sharing)
If the top level Java version is incorrect (i.e., not Java 21), then follow the steps for the Java Command Line Setup.
Java Command Line Setup
The instructions for updating your system’s path variables to support compilation and execution of Java from the command line vary by operating system as described below. You only need to do this if you see the incorrect version of Java as described above.
Windows
Open your Control Panel, and select System.
- On Windows 11, click the Start button, search for System and select the link to Edit the system environment variables. Select the Environment Variables button.
- On Windows Vista, select the Advanced System Settings task. In the resulting window, select the Environment Variables button.
- On Windows XP, select the Advanced tab.
On the Environment Variables window under System variables section, select the Path variable and select Edit.
- If you are updating to a new version of Java JDK, your Path probably already includes an entry for a
bindirectory for a previous JDK version. Update the existing entry to display the location of thebindirectory of your new JDK version. - If you do not already have a Java JDK installed, your Path does not already contain an entry for the bin directory of a JDK installation.
- For Windows 8 and earlier, move your cursor to the end of the text field for entering the value. Add a semi-colon (
;) and add the full path to thebindirectory of your Java installation. Select OK. - For Windows 10 and 11, add a row to the provided table. Select OK.
- For Windows 8 and earlier, move your cursor to the end of the text field for entering the value. Add a semi-colon (
Select the CLASSPATH variable and select Edit. Move your cursor to the end of the text field for entering the value. Add a semi-colon (;) and put a period (.). Select OK. The period represents your current working directory, and means that all files in your current working directory will be on the classpath when compiling and running Java applications. If you do not have a CLASSPATH variable, select the New button, and create one. The name of the variable should be CLASSPATH, in all capital letters.
Test that the versions are correct in the terminal. You will need to open a new terminal to test the version. Any changes made to the path are not updated in any open terminals.
Mac
If you have an older version of Java on your Mac, you should download newer version JDK from Oracle rather than using the Java Control Panel. The Java Control Panel will not update the Java version for the terminal.
Test that the versions are correct in the terminal. You will need to open a new terminal to test the version. Any changes made to the path are not updated in any open terminals.
Setup Development Area
The teaching staff recommend putting all of your development tools and supporting resources together in a common directory. This will keep your development tools separate from the code and other resources that you use in your CSC classes.
Create a folder development in your home directory.
This directory will contain your Eclipse installations (you can have multiple), common libraries, common configuration files, etc. You will later create separate workspaces for different classes or projects that you might be working on.
Install Eclipse
Eclipse Version
Installing the latest version of Eclipse is strongly recommended, but you may be able to continue working with an older version if it is from the last calendar yaer.
Please ensure that you’re installing the correct version of Eclipse depending on the class that you’re enrolled in!
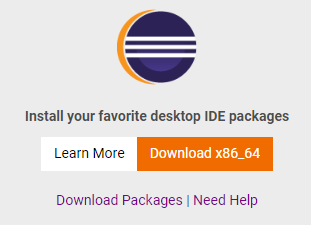
Download the Eclipse Installer for your Operating System. Save the Installer to your development directory. Note that the image below might will have a different version depending on when you download Eclipse. That’s ok! Go with the most recent version.
Run the Eclipse installer.
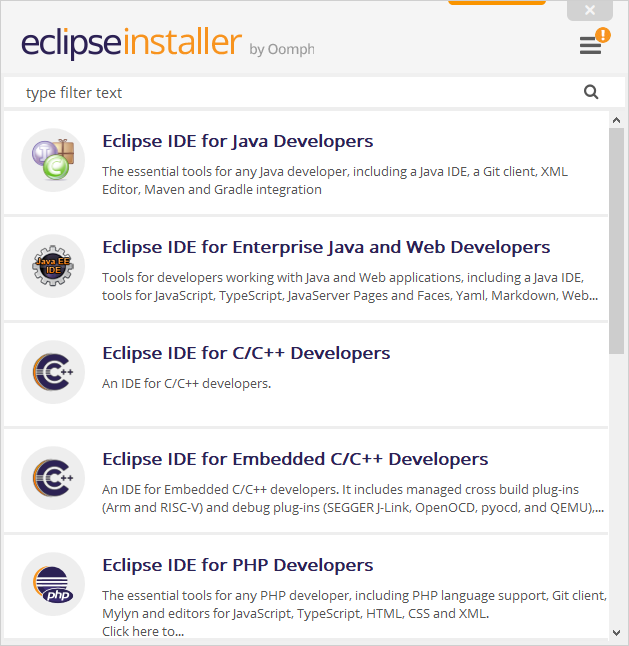
- Select the option Eclipse customization most appropriate for the class you are enrolled in so that you have the appropriate starting set of tools.
- CSC 216: Install Eclipse IDE for Java Developers
- CSC 316: Install Eclipse IDE for Java Developers
- CSC 326: Install Eclipse IDE for Enterprise Java and Web Developers
- Choose a Java 21+ VM location. Browse for the installation directory appropriate for your installed Java version:
- Oracle Java on Windows:
C:\Program Files\Java\jdk-21 - Eclipse Adoptium on Windows: `C:\Program Files\Eclipse Adoptium\jdk-21-0.8.9-hotspot.
- Oracle Java on Windows:
- Choose an installation folder, which should be in your
developmentdirectory. You can change the name of the installation folder fromjava-2025-06to something like oreclipse-jeeif you prefer. Note that we will refer to the Eclipse install directory aseclipse-installin the rest of the installation and usage guide. The image below is for a CSC 326 setup on Windows.- Eclipse for Java Developers on Windows:
C:\Users\username\development\java-2025-06 - Eclipse for Java Developers on Mac/Linux:
/Users/username/development/java-2025-06 - Eclipse for Enterprise Java and Web Developers on Windows:
C:\Users\username\development\jee-2025-06 - Eclipse for Enterprise Java and Web Developers Mac/Linux:
/Users/username/development/jee-2025-06
- Eclipse for Java Developers on Windows:
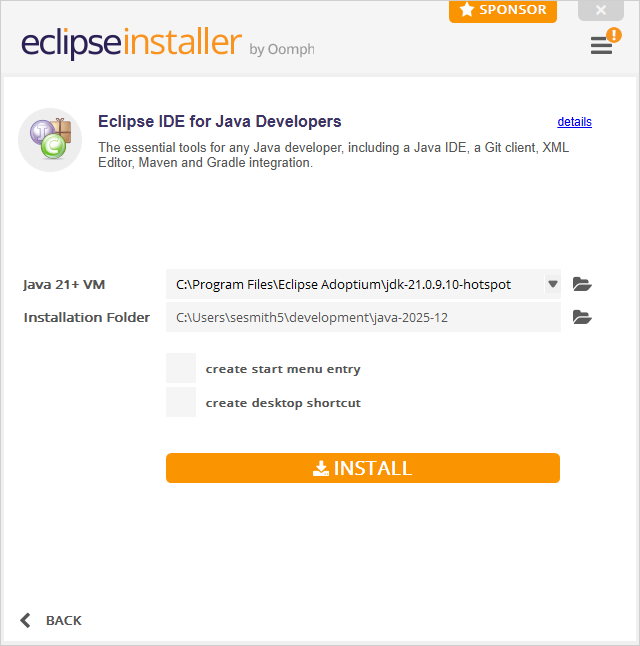
- Click INSTALL.
Running Eclipse
To install the required plug-ins, you must first start Eclipse. Open the <home-directory>/development/eclipse-install/eclipse/ folder. Double click the eclipse.exe item.
Java Version Error when Starting Eclipse
If Eclipse does not start due to a Java version error, you have two options:
- Option 1: Update the
<home-directory>/development/eclipse-install/eclipse.inifile so that the-vmargument points to the<java install directory>/bin/javaw.exeexecutable. - Option 2: Install an earlier version of Java, add it to the class path, and have Eclipse use the earlier version of Java to launch Eclipse. Once Eclipse launches, you can add JDKs to Eclipse through the Window > Properties > Java JRE menu. This means you can have multiple versions of Java available, and switch them out for each project. You can develop your projects with Java 11 while Eclipse runs with an earlier version of Java.
Eclipse Workspaces
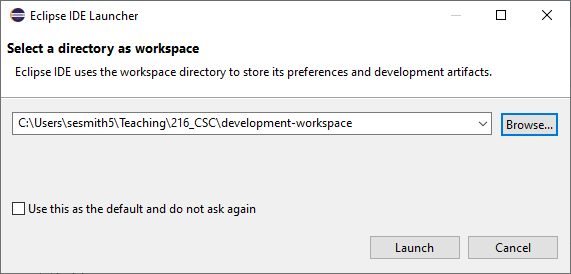
When you first start Eclipse, you are asked to select your workspace. The Eclipse workspace is a location on your file system (one of possibly many) for your work. Choose any location on your hard drive where you want your work to be stored and press OK to load the workspace. You may want to create a workspace in a folder for each class on your hard drive using a structure like <home-directory>/<course>/development-workspace/. For example, <home-directory>/CSC216/development-workspace would be appropriate for CSC 216 and <home-directory>/CSC326/development-workspace would be appropriate for CSC 326. If the folder doesn’t exist, Eclipse will create it.
You may get a pop-up from your operating system’s security programs (e.g., Windows Defender). You can exclude Eclipse from scanning to improve performance if you would like.
Eclipse Perspectives
The first time you start with a fresh workspace, the Welcome view opens. The Welcome view will always display at start up unless you uncheck the Always show Welcome at start up in the lower right hand corner of the view. Close that view by selecting the X on the Welcome tab under the Eclipse menu.
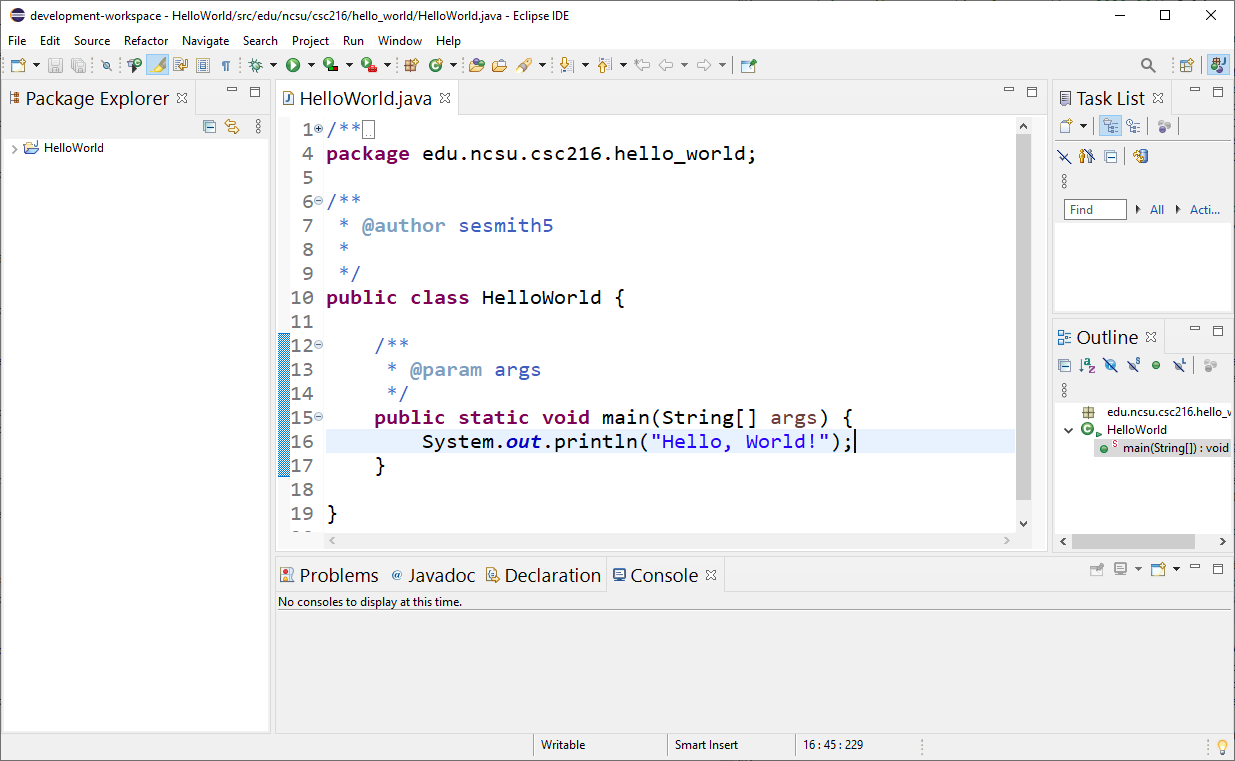
The main Eclipse interface is called the Java Perspective (which will have this icon in the upper-right:  ). A perspective is tied to high-level developer tasks like developing and debugging. The perspective contains views that support the overarching task. The Java perspective has a tool bar of buttons along the top that allow for the creation of new items or for running an application. The left side of the perspective contains the Package Explorer, which contains the project contents shown in a hierarchical manner. The middle portion of the perspective is the Editor, which contains tabs for each file open for editing. The Outline view, along the right of the perspective, lists key information about the file open in the editor. If the file is a Java file, the Outline View will list the methods. The upper right view is a Task List. The bottom of the perspective contains the Problems view and several other views as tabs. The Problems view lists compiler errors and warnings.
You can move around and resize the windows (called Views) that make up the perspective. Views can be stacked in an area of the screen and tabs are used to switch between views. If you want to reset the perspective to how it originally looked, go to Window > Reset Perspective. If you are not in the Java perspective, use Window > Open Perspective > Other… > Java (NOT Java Browsing!).
Java in Eclipse
On first launch, Eclipse is configured to build Eclipse projects with the version of Java on your computer’s path. You should ensure that Eclipse is configured to use the appropriate version of Java for your CSC class. You can also add other versions of Java to your Eclipse set up and configure each project to work with different Java versions if needed.
You can see the version(s) of Java install and add/edit/delete installed version(s) of Java by doing the following:
- Select
- Windows users: Window > Preferences > Java > Installed JREs.
- Mac users: Eclipse > Preferences > Java > Installed JREs.
- Check that the checked, bold JRE is the most recent Java 21. If so, that’s your default workspace JRE and you’re done. Click Apply and Close.
- If the checked, bold JRE is NOT Java 21, you need to add a Java 21 JRE to your Eclipse installation. Click Add, select Standard VM and Next.
- Search for the install Directory of your Java 21 JDK (remember the JDK is a superset of the JRE libraries). The JRE name and JRE system libraries will automatically population. Click Finish.
- On the Installed JREs screen, check the Java 21 JRE to be the workspace default. Click Apply and Close.
Git Configuration
We will be using Git and GitHub to submit work for CSC courses. At a minimum you need to configure Git for Eclipse so that your username and email use your NCSU information. The default information is your laptop name, which may mean that you won’t get credit for the work that you’re submitting if we are unable to determine who made the submission.
Work will be submitted to the NC State Cloud GitHub Enterprise system at github.com.
Do the following to start working with Git:
Install Git Locally
STRONGLY ENCOURAGED: You can also install Git on your operating system. If you do so, follow the instructions in the Git Tutorial First Time Configuration for Git Bash
Eclipse Plug-ins
Functionality of Eclipse is extended through the use of plug-ins. Many plug-ins that we use come with the base Eclipse Java installation, but we need several other plug-ins for our work. Information about installing and configuring each of the plug-ins is listed below:
Your instructor will let you know which plug-ins are expected for your class.
Eclipse Plug-in Versions
Plug-in version numbers may vary from the screenshots. Please download the most recent version available on the Eclipse Marketplace.
CheckStyle
CheckStyle is a static analysis tool with a focus on style conventions of the Java programming language.
Installation
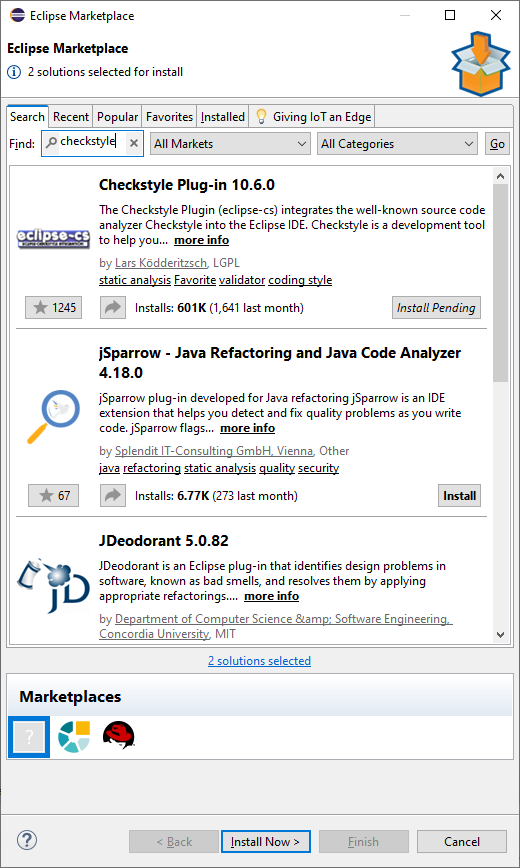
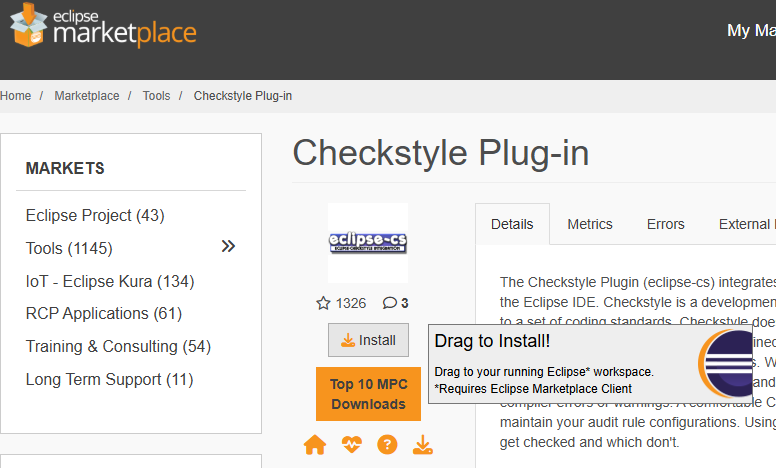
CheckStyle can be installed through the Eclipse Marketplace. Access the Marketplace through Help > Eclipse Marketplace… or via the Eclipse Marketplace Website (instructions).
- Enter Checkstyle in the search bar and search for the plug-in. The logo for CheckStyle will contain eclipse-cs. DO NOT install CheckStyle Contributions!
- After you find the plug-in, click the Install button. If the install button is missing, see the Troubleshooting section below.
- The menu will list the plug-in features that will be installed. You do not have to install optional features. Select the features you want to install and click Confirm.
- Accept the license agreement and click Finish.
The plug-in will install (you may be given a warning about unsigned content, accept the warning to continue with the install), and you will be prompted to restart Eclipse. You may restart Eclipse after each installation, or you can wait until you have installed all of the plug-ins and then restart Eclipse.
Troubleshooting CheckStyle
If you are unable to install CheckStyle through the Eclipse Marketplace, try one of the following:
- Drag the Install button to your running Eclipse from the Checkstyle Plug-in Eclipse Marketplace webpage
- Use the update site URL https://checkstyle.org/eclipse-cs-update-site and install via an Eclipse Update Site.
Configuration
With all CheckStyle notifications turned on, you could receive hundreds of reports! We will use a custom configuration for CheckStyle that focuses on notifications for violations of the CSC Style Guidelines.
- Download the CheckStyle configuration file for CSC Courses (right click the link and select Save As). These are the configuration files that we use for automated grading. By having a copy of these configuration files locally in Eclipse and running CheckStyle on your code, there should be no surprises during grading.
- Save the configuration files into your
developmentdirectory. - Select
- Windows users: Window > Preferences > CheckStyle.
- Mac users: Eclipse > Preferences > CheckStyle.
- Click the New… button.
- Select the Type to be External Configuration File. Give the configuration a name, like CSC CheckStyle. Browse to the location of
csc_checkstyle.xml. Click the OK button. - Select the configuration you just created in the Global Check Configuration table. Click the Set as Default button.
- Click the OK (or Apply and Close) button. If prompted to complete a full build of your workspace, click Yes.
Project Activation
CheckStyle needs to be turned on for each project so that it will run with every build. To activate CheckStyle for a project, do the following:
- Right click on the project and select Properties > Checkstyle.
- Click the check box next to Checkstyle active for this project. Ensure that the CSC CheckStyle configuration is selected.
- Click Apply and Close.
SpotBugs
SpotBugs is a static analysis plug-in that looks for potential problems with your code that compilation and some testing may not be able to find. SpotBugs builds on FindBugs.
Installation
SpotBugs can be installed through the Eclipse Marketplace. Access the Marketplace through Help > Eclipse Marketplace… or via the Eclipse Marketplace Website (instructions)..
- Enter SpotBugs in the search bar and search for the plug-in.
- After you find the plug-in, click the Install button. If the install button is missing, see the Troubleshooting section below.
- The menu will list the plug-in features that will be installed. You do not have to install optional features. Select the features you want to install and click Confirm.
- Accept the license agreement and click Finish.
The plug-in will install (you may be given a warning about unsigned content, accept the warning to continue with the install), and you will be prompted to restart Eclipse. You may restart Eclipse after each installation, or you can wait until you have installed all of the plug-ins and then restart Eclipse.
Troubleshooting SpotBugs
If you are unable to install SpotBugs through the Eclipse Marketplace, try one of the following:
- Drag the Install button to your running Eclipse from the SpotBugs Plug-in Eclipse Marketplace webpage
- Use the update site URL https://spotbugs.github.io/eclipse/ and install via an Eclipse Update Site.
Configuration
For SpotBugs, we are only interested in fixing the Scary or Scariest notifications. Set up the global SpotBugs configuration by doing the following:
- Select
- Windows users: Window > Preferences > Java > SpotBugs.
- Mac users: Eclipse > Preferences > Java > SpotBugs.
- Move the slider to the left until it is at 9 (Scary).
- Click Apply and Close.
Project Activation
SpotBugs needs to be turned on for each project so that it will run with every build. To activate SpotBugs for a project, so the following:
- Right click on the project and select Properties > SpotBugs.
- Click the check box next to Run automatically.
- Click Apply and Close.
PMD
PMD is another static analysis tool that looks for a different set of problems, some more related to style and programming language inconsistencies.
Install
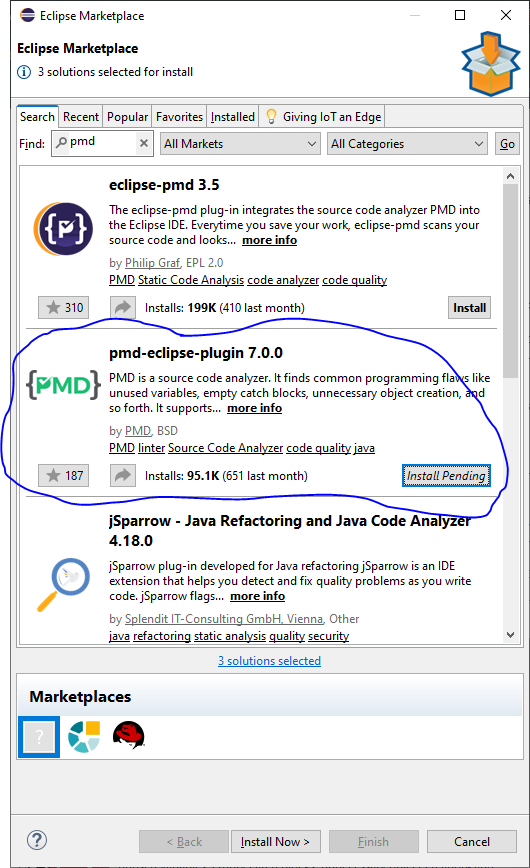
PMD can be installed through the Eclipse Marketplace. Access the Marketplace through Help > Eclipse Marketplace… or via the Eclipse Marketplace Website (instructions)..
- Enter PMD in the search bar and search for the plug-in. Do NOT install eclipse-pmd.
- After you find the plug-in, click the Install button. If the install button is missing, see the Troubleshooting section below.
- The menu will list the plug-in features that will be installed. You do not have to install optional features. Select the features you want to install and click Confirm.
- Accept the license agreement and click Finish.
The plug-in will install (you may be given a warning about unsigned content, accept the warning to continue with the install), and you will be prompted to restart Eclipse. You may restart Eclipse after each installation, or you can wait until you have installed all of the plug-ins and then restart Eclipse.
Troubleshooting PMD
If you are unable to install PMD through the Eclipse Marketplace, try one of the following:
- Drag the Install button to your running Eclipse from the PMD Plug-in Eclipse Marketplace webpage
- Use the update site URL https://pmd.github.io/pmd-eclipse-plugin-p2-site/ and install via an Eclipse Update Site.
Configuration
With all PMD notifications turned on, you could receive hundreds of reports! Additionally, we use a custom configuration for PMD that focuses on notifications for violations of the CSC Style Guidelines and several custom notifications related to testing practice.
Save the configuration files into your development directory.
- Download the PMD configuration file for CSC courses (right click the link and select Save As). These are the configuration files that we use for automated grading. By having a copy of these configuration files locally in Eclipse and running PMD on your code, there should be no surprises during grading.
- Save the configuration files into your
developmentdirectory. - Select
- Windows users: Window > Preferences > PMD > Rule Configuration.
- Mac users: Eclipse > Preferences > PMD > Rule Configuration.
- Click the Use global rule management checkbox.
- Delete EACH of the listed rules by clicking the rule, then clicking the red X “Remove rule” button. Note: Selecting the check boxes and clicking remove does NOT remove the rules. You must highlight the rules that need to be deleted. To do this all-at-once in Windows, you can click a single rule, hit CTRL + a to highlight all the rules, then click the red X.
- Click the Import rule set… button (below the red X) and Browse for the
csc_pmd.xmlfile. You can leave the Import by Reference check box selected. Click OK. - The rules will be listed. All 53 rules should be active (a check mark indicates the rule is active). If the rules are not active, click the “Check all rules” button. Click OK (or Apply and Close) to apply the rules. If prompted to complete a full build of your workspace, click Yes. [NOTE: You may need to click Apply & Save and exit the Preferences window and then return to see the rules listed so that you may activate them.]
Project Activation
PMD needs to be turned on for each project so that it will run with every build. To activate PMD for a project, so the following:
- Right click on the project and select Properties > PMD.
- Click the check box next to Enable PMD.
- Click Apply and Close.
Install Plug-ins via Eclipse Marketplace Website
If the Eclipse Marketplace isn’t working in the Eclipse IDE, you can drag and drop the plug-ins from the Eclipse Marketplace Website into the Eclipse IDE.
Search for the plug-ins as above. Then drag the Install button to your Eclipse workspace.
Install Plug-ins via Update Site
Sometimes plug-ins are not available through Eclipse Marketplace. Plug-in authors also host their own plug-in update sites that users can connect to when installing their plug-ins. The URLs to any needed update sites are listed, below.
Follow these steps for installing a plug-in from an update site:
- In Eclipse, select Help > Install New Software….
- Click the Add button to add a new update site.
- Enter the plug-in name and the plug-in update site URL. Click OK.
- CheckStyle: https://checkstyle.org/eclipse-cs-update-site
- SpotBugs Update Site: https://spotbugs.github.io/eclipse/
- PMD Update Site: https://pmd.github.io/pmd-eclipse-plugin-p2-site/
- Select PMD for Eclipse 4
- Select the checkbox next to the plug-in name and click Next >.
- Verify your install details and click Next >.
- Accept the license agreement and click Finish.
You may be prompted with a warning about installing software that contains unsigned content when installing from non-Eclipse Marketplace sources. Please select OK to continue with the install. The plug-in will install, and you will be prompted to restart Eclipse. You may restart Eclipse after each installation, or you can wait until you have installed all of the plug-ins and then restart Eclipse.